
How to change your automation settings
Each automation has its own settings: which QuickBooks accounts it uses, how customers and products are created, and class tracking. You can change them at any time.
1. Open the settings of your automation
Sign in at app.sush.io. On the Automations page, find the automation you want to change and click Settings.
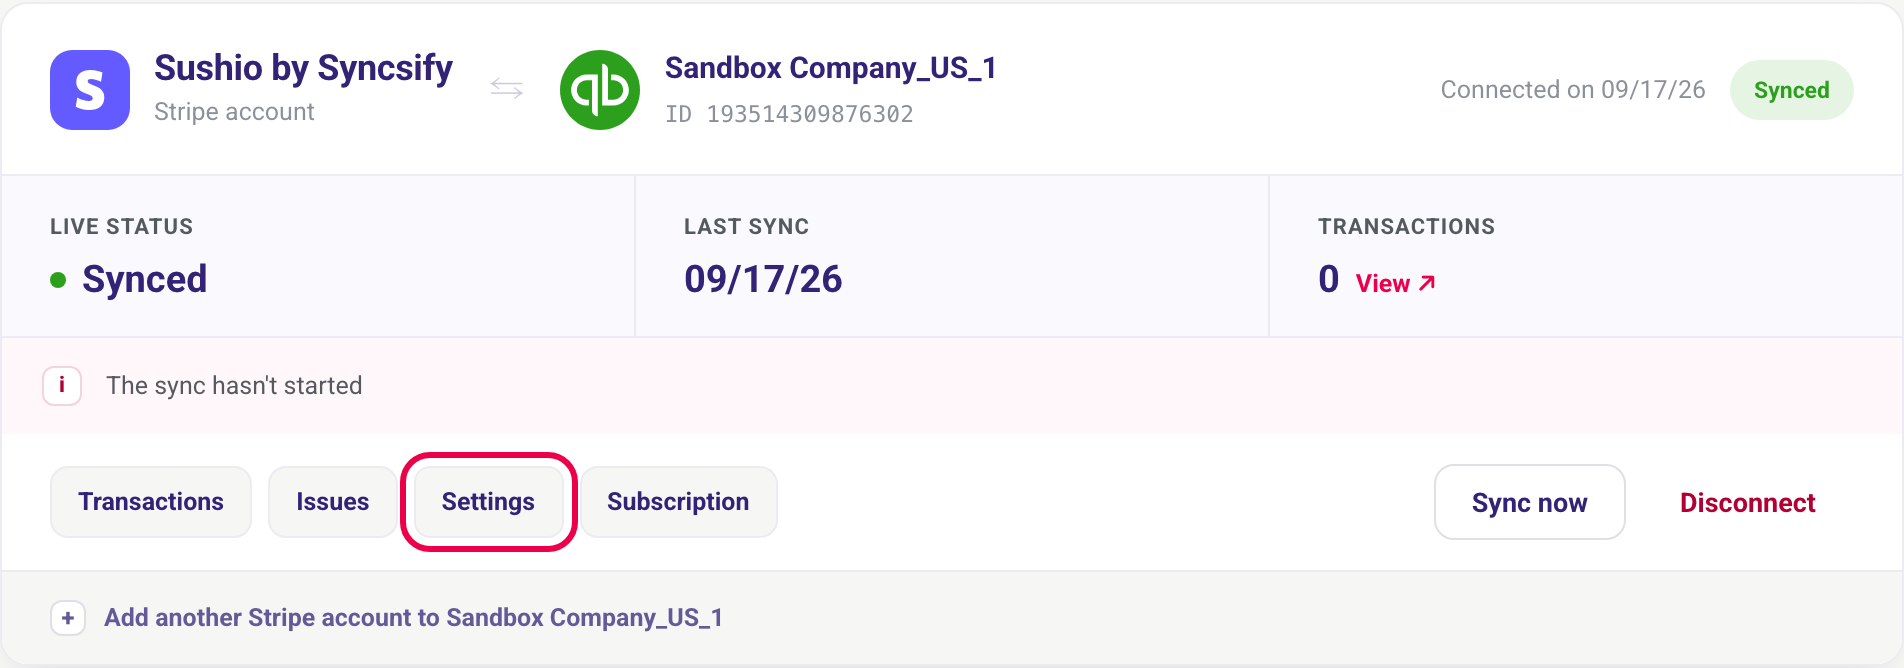
2. Review your settings
The settings page is split into sections. The options shown depend on the source (Stripe, Braintree or Etsy).
- Period: the Sync Starting Date and the date of the last sync. The starting date is fixed once the automation is billed, because moving it back would replay history already posted to QuickBooks.
- Customers and products: create each customer and product from your source in QuickBooks (detailed reporting), or post every sale to one generic customer or product (a lighter chart of accounts).
- QuickBooks Accounts: the accounts from your chart of accounts used by the automation, such as the Bank Account where payouts are deposited, the Income Account and the Expense Account for fees. If you leave Create a default account, Sush.io creates the account on the next sync.
- Taxes (when available for your source): the fallback tax code used when your source returns a tax amount without a usable rate.
- Class Tracking: assign a QuickBooks class to your transactions. Class tracking must first be turned on in QuickBooks Online.
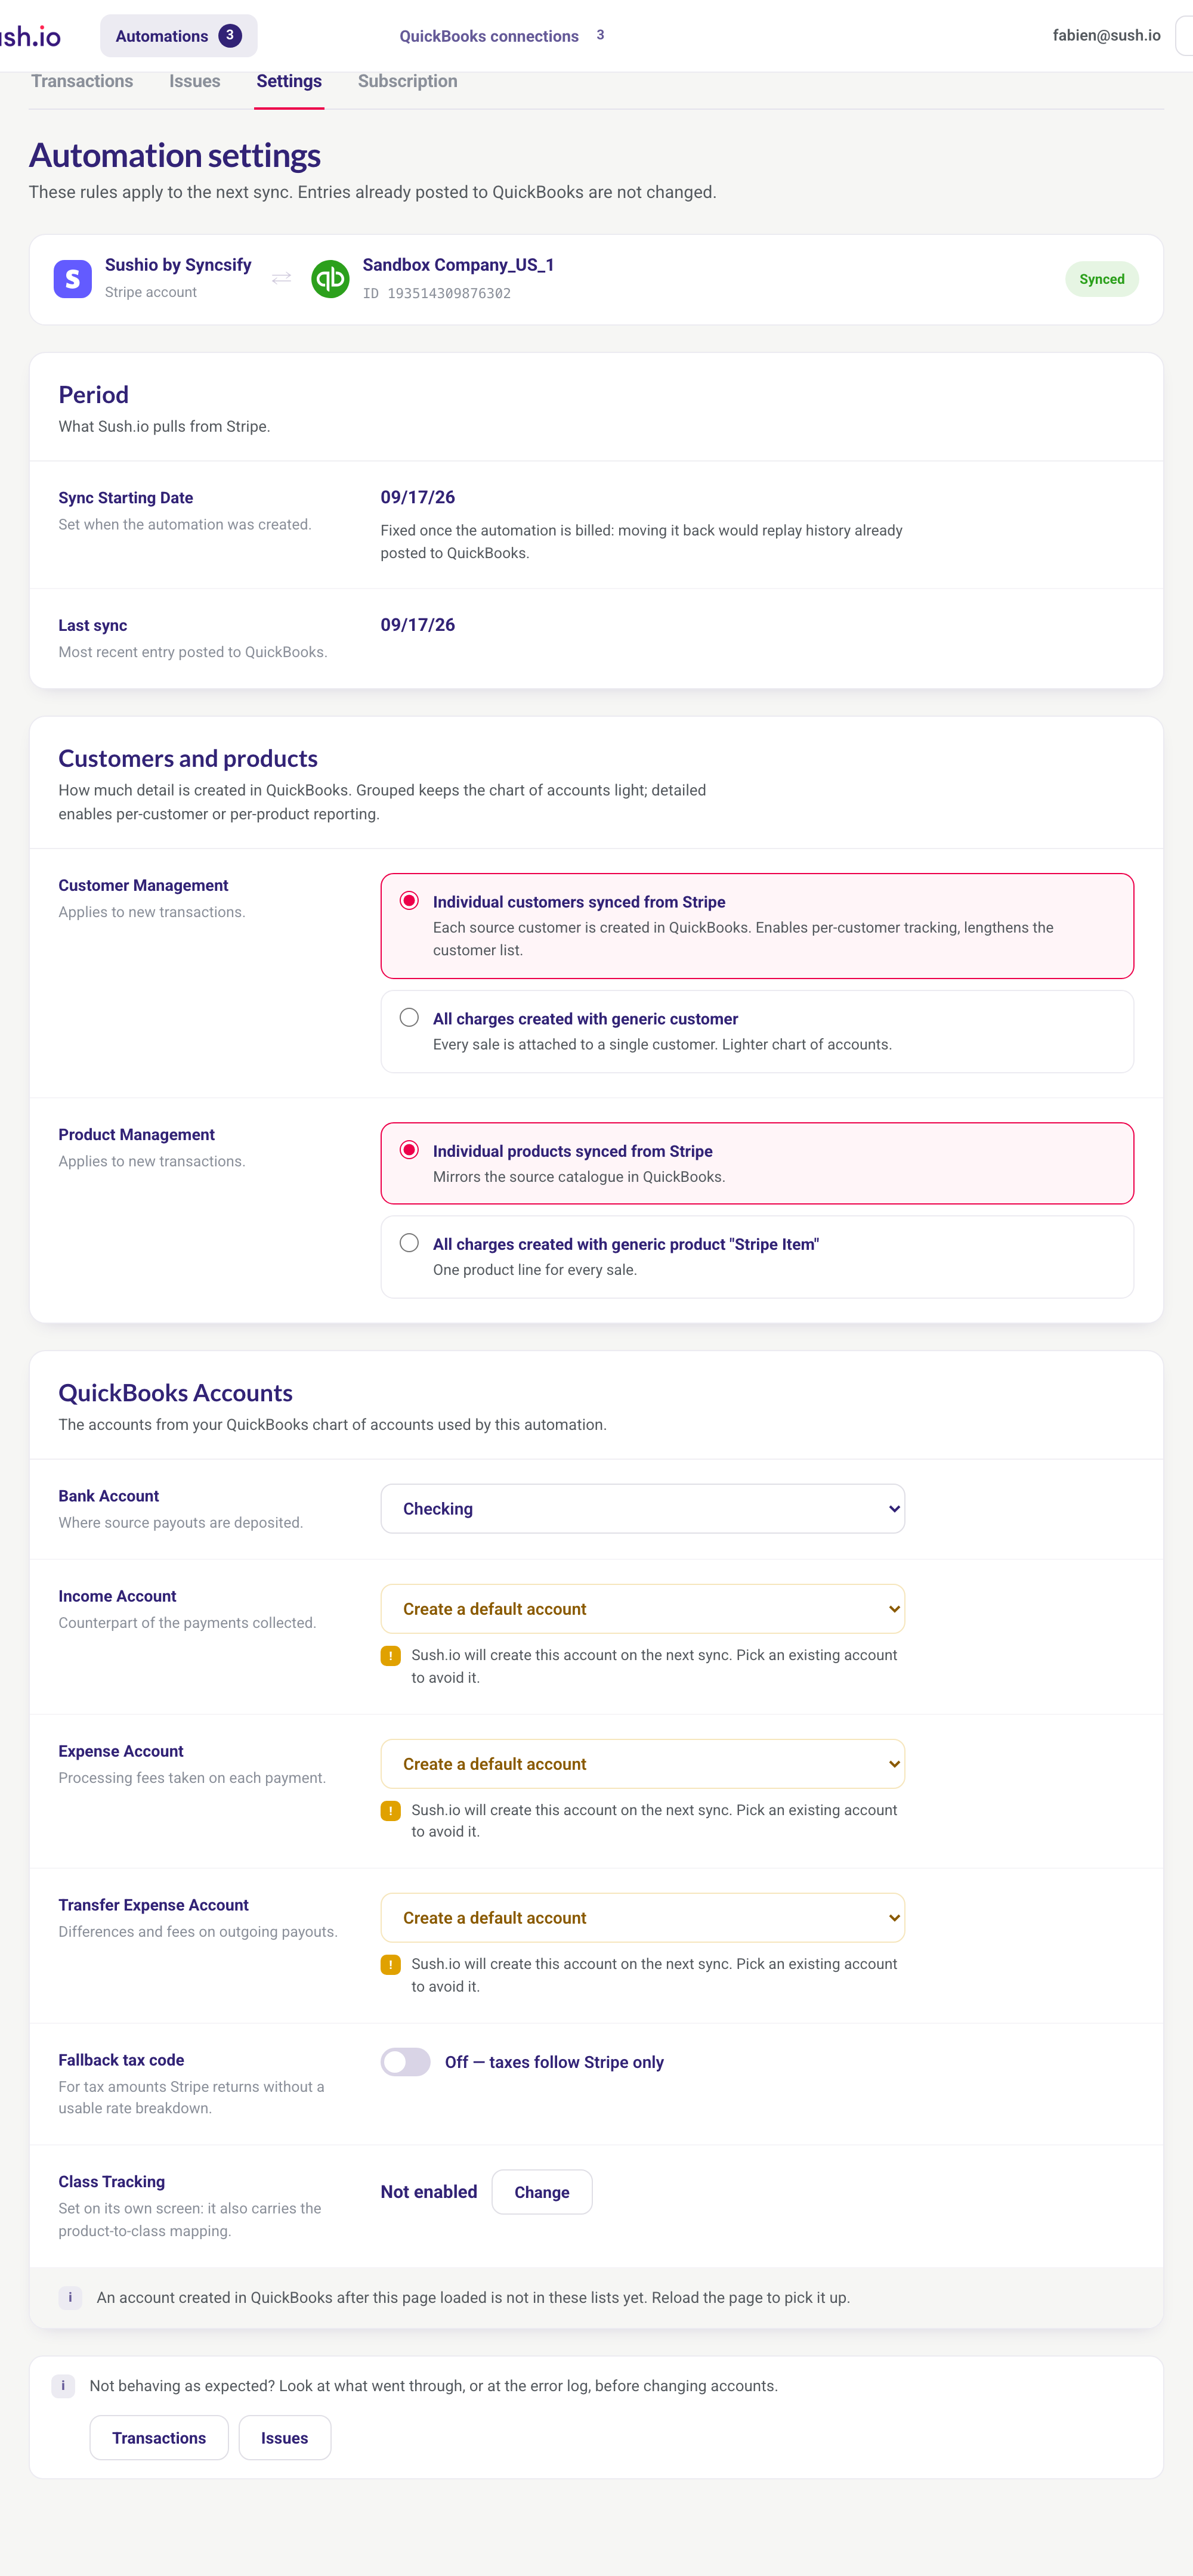
Created a new account in QuickBooks Online while the page was open? Reload the page to see it in the lists.
3. Save your changes
As soon as you change an option, an Unsaved changes bar appears at the bottom of the page. Click Save to apply your changes, or Cancel to discard them.
[Image : 3-settings-savebar.png]
Good to know
- New settings apply from the next sync. Transactions already posted to QuickBooks Online are not changed.
- Don't want to wait for the daily sync? Click Sync now on the Automations page (once per hour).
- Something not syncing as expected? Check the Transactions and Issues tabs of the automation before changing accounts.
Need help?
Contact us through the Need help? button in the app.